|
Calipers come in various configurations but there are three common styles. Vernier, Dial and Electronic.
These three types are similar in construction and general appearance but vary in function and ease of use. Each has their own strengths and weaknesses which must weighed before selecting the appropriate equipment.
The Vernier caliper was originally designed and graduated similar to the micrometer in that it incorporated a scale equal in value to .025 ( like the single revolution of the micrometer thimble). Later, the 50 grad style was introduced to expand the graduations and make it much easier to see without the use of an eyepiece. Here lies the shortcoming of the tool. In order to interpret the dimension you must align an etched line on the tools " vernier plate" with an equally spaced line running the length of the tools handle. The alignment of the these lines is critical if you are to measure to the stated accuracy of the tool. Despite this shortcoming they are rugged , forgiving instruments that if used and cared for properly by a skilled machinist, will last for many years.
Dial calipers came on the scene around 30 years ago and have,in my opinion overtaken the micrometer as the first measuring tool of choice for the machinist or toolmaker. They provide the ability to quickly read dimensions, both inside and out ,like their predecessor and also feature the addition of the depth measurement rod. Also, the range from 0-6 or greater make these an attractive alternative to the micrometer which would require the purchase of multiple tools. .
The dial caliper is also easier to read which translates to speed in the work place. As for the construction, the dial is fixed to the moveable jaw and rides along the tools bar or slide, meshing with a toothed rack .This rack typically is a ground bar so each tooth is equal to .025 or one quarter of the dial resolution, and four teeth equal .100. The bar is graduated in .100 increments instead of the more complex .025 or .050 of the vernier and the dial is graduated from .001 up to one hundred thousandths.First you read the number on the bar and then the dial figure to get readings to the nearest .001 of an inch. Another relatively new feature to the caliper is the ability of the inside measurement jaws to pass by each other so smaller dimensions can be read and a single scale is needed which further makes the readings easier to determine .
The depth rod addition extends beyond the bar and travels as the jaws are moved in and out . Larger length tools have a detachable rod so when not in use the rod can be removed to prevent obstruction. This rod simply unscrews and is quickly removed or attached.
Like the vernier, the dial caliper has a few drawbacks , the first and unfortunately the most annoying being the toothed rack that is necessary to carry the dial pinion gear is subject to contamination. Some designs discourage this from occurring , such as with rack teeth that point down. This tends to cause the foreign material to be shed more easily. However fine metal chips or similar materials could still become lodged in the gullets of the rack .And if the pinion gear is run over this chip this will cause the pinion to jump to the next gullet and cause the tool to get "out of time" resulting in the failure of the hand returning to zero.
The second consideration is the I.D .jaws. In order to make the pass by design function they are considerably thinner than the contacts on the vernier style which means they can wear quickly if used on abrasive materials.
Caring for calipers and micrometers is mostly an issue of common sense. These tools are delicate instruments , constructed to exacting tolerances and designed for long service. Keep them free of foreign particles whenever possible and when not in use, store them in their appropriate container. If you allow them to be left unprotected on a bench, they will probably be damaged. A light coating of high-grade instrument oil will also go a long way to extend the life of the tool. A note of Caution ,resist the urge to spray the tools with some of the protectarant type oils.Instead, these products are designed to place a coating on the material so as to resist rusting. Were this coating to attach to the threads or teeth of the micrometer / caliper you will notice a change in the calibration. If the tools are to be stored for a period of time, the placing of a silica gel pack into the toolbox draw will also help to retard rusting.
ADJUSTMENT OF MICROMETER
Although adjustment of Starrett Micrometers is rarely needed, in the event it becomes necessary, they can be readily adjusted in two easy operations as follows.
- If any play should develop in the spindle screw threads due to wear of the spindle nut after long use, first back off the thimble, insert the spanner wrench in the slot of the adjusting nut and tighten just enough to eliminate play. Illustration at lower left shows how easily this is done.
- After carefully cleaning all dirt or grit from the measuring faces of anvil and spindle, bring them together and insert the spanner wrench in the small slot of the sleeve. Then turn the sleeve until the line on the sleeve coincides with the zero line of the thimble as shown at the lower right.
Sharpening dividers on oil stone . In sharpening , rub the point back and forth on the stone , giving it a circular motion obtained by twisting the wist back and forth , at the same time turning the point around to present a fresh surface to the stone at all times . The point should be ground so that it is straight with the center line of the leg.
|
English measure
Vernier Tools permit highly accurate measurements in thousandths of an inch and are read as follows. Referring to the illustration above at the left, the bar of the tool is graduated in 40ths or .025 of an inch, every fourth division, representing a tenth of an inch, being numbered. The Vernier plate is divided into twenty-five divisions numbered 0,5,10,15,20,25. The twenty-five divisions on the Vernier occupy the same space as twenty-four divisions on the bar.
Since one division on the bar equals .025 inch, 24 divisions equals 24x .025 or .600 inch and 25 divisions on the Vernier also equal .600 inch. Therefore one division on the Vernier equals 1/25 x .600 or .024 inch and the difference between one bar division and one Vernier division equals .025 less .024 or .001 inch. If the tool is set so that the 0 line on the Vernier coincides with the 0 line on the bar, the line to the right of the 0 on the Vernier will differ from the line to the right of the 0 on the bar by .001 inch; the second line by .002 inch and so on. The difference will continue to increase .001 inch for each division until the line 25 on the Vernier coincides with line 24 on the bar.
Metric measure
The same principles are used in reading Vernier tools in metric measure as those in English measure except that readings are obtained in 1/50 of a millimeter or .02mm.
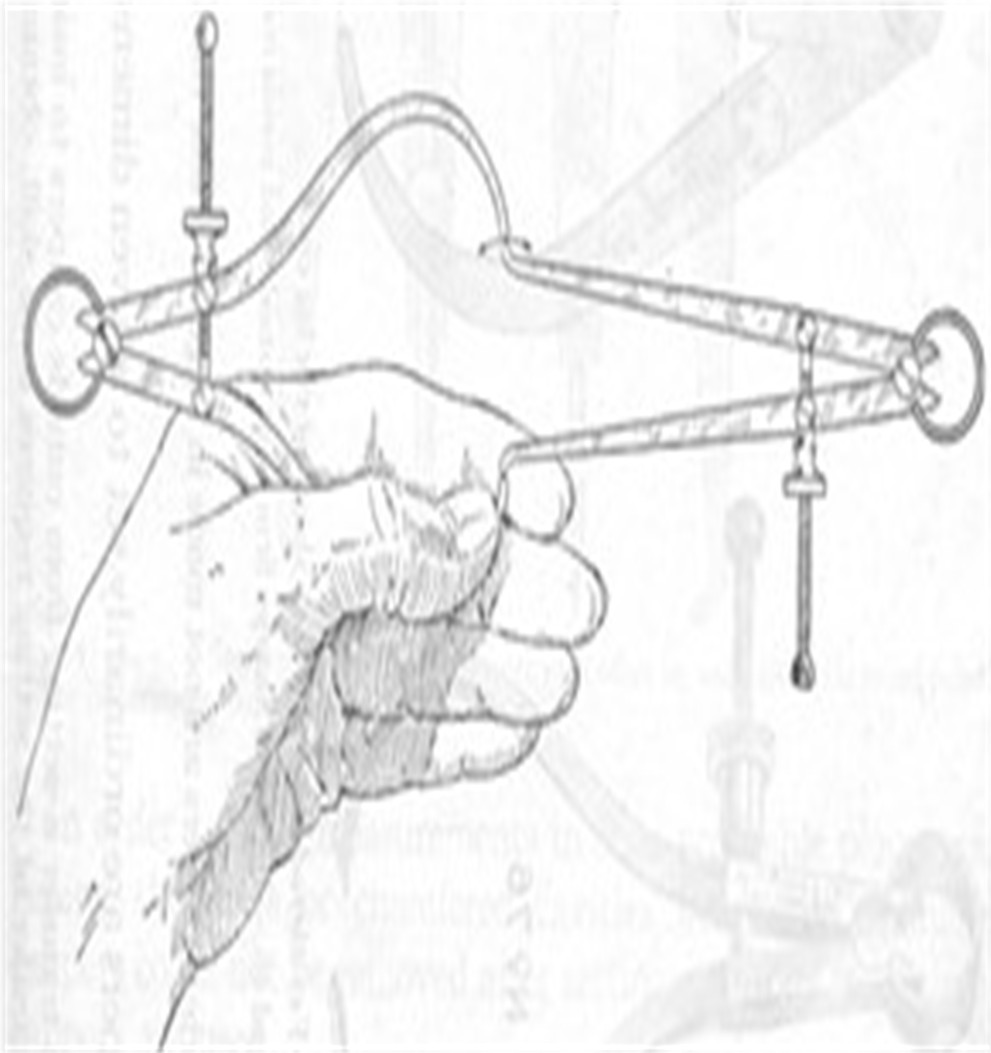
Starrett foundry and forging calipers. Note the long handle to protect the hand from the heat. The long leg is used for the greater and the short one for the smaller or finished size. The difference in the length of arms prevents using the wrong caliper when there is but slight variation in the work measured .
To transfer a setting from outside calipers to inside calipers. Hold the outside calipers with the left hand as shown in and adjust inside calipers to the setting of the outside calipers. In doing this , give the inside calipers a circular motion (indicate by the arc) until the proper contact is obtained.
|